
|
The world of non-commercial film and A-V |
Events Diary | Search | ||
| The Film and Video Institute | | ||||
The Videomaker's Journey: part nine |
CONTENT
This is about camera angles. When practical always take the next shot from a different angle and change the shot size.
-
High angles.
The video camera is high - the audience has a sense of power, the status of the subject is reduced, the audience is “looking down on them” - but only if so indicated by the narrative, See Fig. 10 in Part 7 (Framing and Composing Shots 2) -
Low angles.
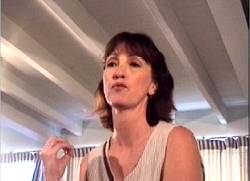
The video camera is low - the subject dominates the situation, the person's stature is increased, the audience is “looking up to them” (sometimes seen on News TV). This can also indicate menace, again this is only so if it is indicated by the narrative. See Fig. 13a. -
At eye level.
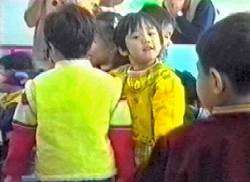
Normally have the video camera at eye level - get down to the eye level of children and seated people. See Fig. 13b. -
Perspective.
A scene taken from directly in front of a building, makes it look flat. The video camera should be located well to one side of centre so as to add depth and contrast to the structure. See pictures in Part 6 (Framing and Composing Shots 1).
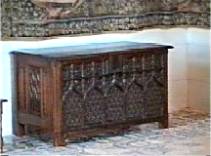
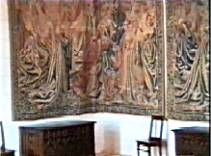
The same rule applies when shooting travel movies inside rooms: shoot at an angle to the wall or furniture. The exception here is when taking shots of paintings, start with a close-up of part of the painting, then zoom back to a wide-angle of most, or all, of the painting. The video camera should be square in front of the painting for this shot. If you are going to zoom back far enough to include furniture and other objects, then locate the video camera to one side of the picture at an angle to the furniture and the main wall in the scene, before starting to record the shot. See Fig’s 13c, 13d and 13e.
 |
 |
| Fig. 13a LOW ANGLE |
Fig. 13b AT EYE LEVEL |
 |
 |
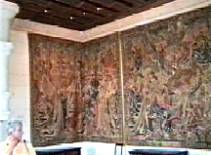 |
| Fig. 13c 3 second Still | Fig. 13d Zoom |
Fig. 13e 3 second Still |
FURNITURE AND TAPESTRY |
||
Diagonal lines, the Dutch angle and the Dutch tilt.
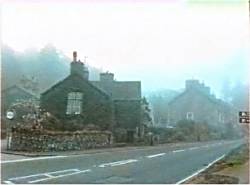
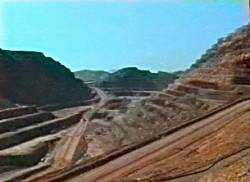
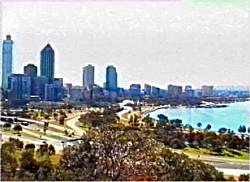
- Look for diagonal lines such as a shore line, or a tree-lined road, receding at an angle. This enhances the shot and provides depth to the scene. See Fig’s 14a,14b and 14c.
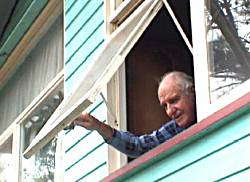
- An external shot of someone looking out of a window - place the video camera, low and to one side. See Fig. 14d.
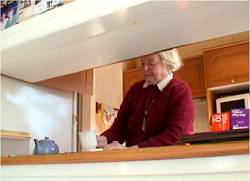
- A servery between a kitchen and dining room or a similar rectangular opening can provide an excellent opportunity for the Dutch angle. Place the video camera low, and to one side. This provides a multitude of diagonal lines and depth to the scene. Note that the video camera is tilted up, but not tilted sideways for this shot. See Fig. 14e.
- The video camera can be tilted up and sideways for Dutch tilt shots. A woman is walking quickly, she looks back in alarm. Tilt the video camera so that she appears to lean backwards. This will add tension. Try this in a static mid shot or a medium close-up when you have a panic situation. See Fig. 14f.
 |
 |
| Fig. 14a GRASMERE ENGLAND |
Fig. 14b ARGYLE DIAMOND MINE |
 |
 |
| Fig. 14c PERTH WESTERN AUSTRALIA |
Fig. 14d DUTCH ANGLE |
 |
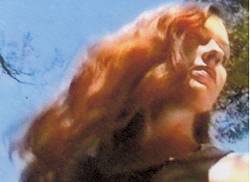 |
| Fig. 14e DUTCH ANGLE | Fig. 14f DUTCH TILT |
The use of different size
shots.
(This is further advice for making dramas.)
-
The big close-up (BCU).
A shot focused on the eyes can help to portray fear or a menacing situation when used in an appropriate sequence, or a BCU of eyes and ears can be used in conjunction with a menacing sound. A BCU of a hand or door knob turning, can be used to add tension to a scene. -
The medium shot (MS).
This displays interaction between two characters as well as their facial expressions, it also includes the body language of the actors. Before television, this shot was the main vehicle for dialogue scenes on the big screen. It is frequently used in conjunction with the close-up to provide variety in dialogue scenes and thus bring a pleasing pace to a movie. -
The medium long shot of people (MLS).
Take care with this shot when the scenery provides an ordinary background. It is not a good shot to use - you don’t get a good look at the people's faces. -
The long shot (LS).
This connects the actors to the immediate environment, it also allows the actor’s body language to be shown effectively. -
The very long shot (VLS).
The VLS shows the setting and a hint of the country beyond. -
The medium close-up (MCU) and the medium long shot (MLS).
These are used to provide a larger variation in shot sizes, this helps to make sure that adjacent scenes do not appear to be jump-cuts. Part 17 (Theory and Practice of Editing) explains what a jump cut is.
< Part 8 | Introduction | Part 10 >
© copyright Arthur Bullock, 2007
Share your passions.
Share your stories.